Manage Filters
Welcome to the Manage Filters page! This is where you can create, manage, and organize your filters. Filters determine what items appear in your Monitor, so setting them up correctly is essential.
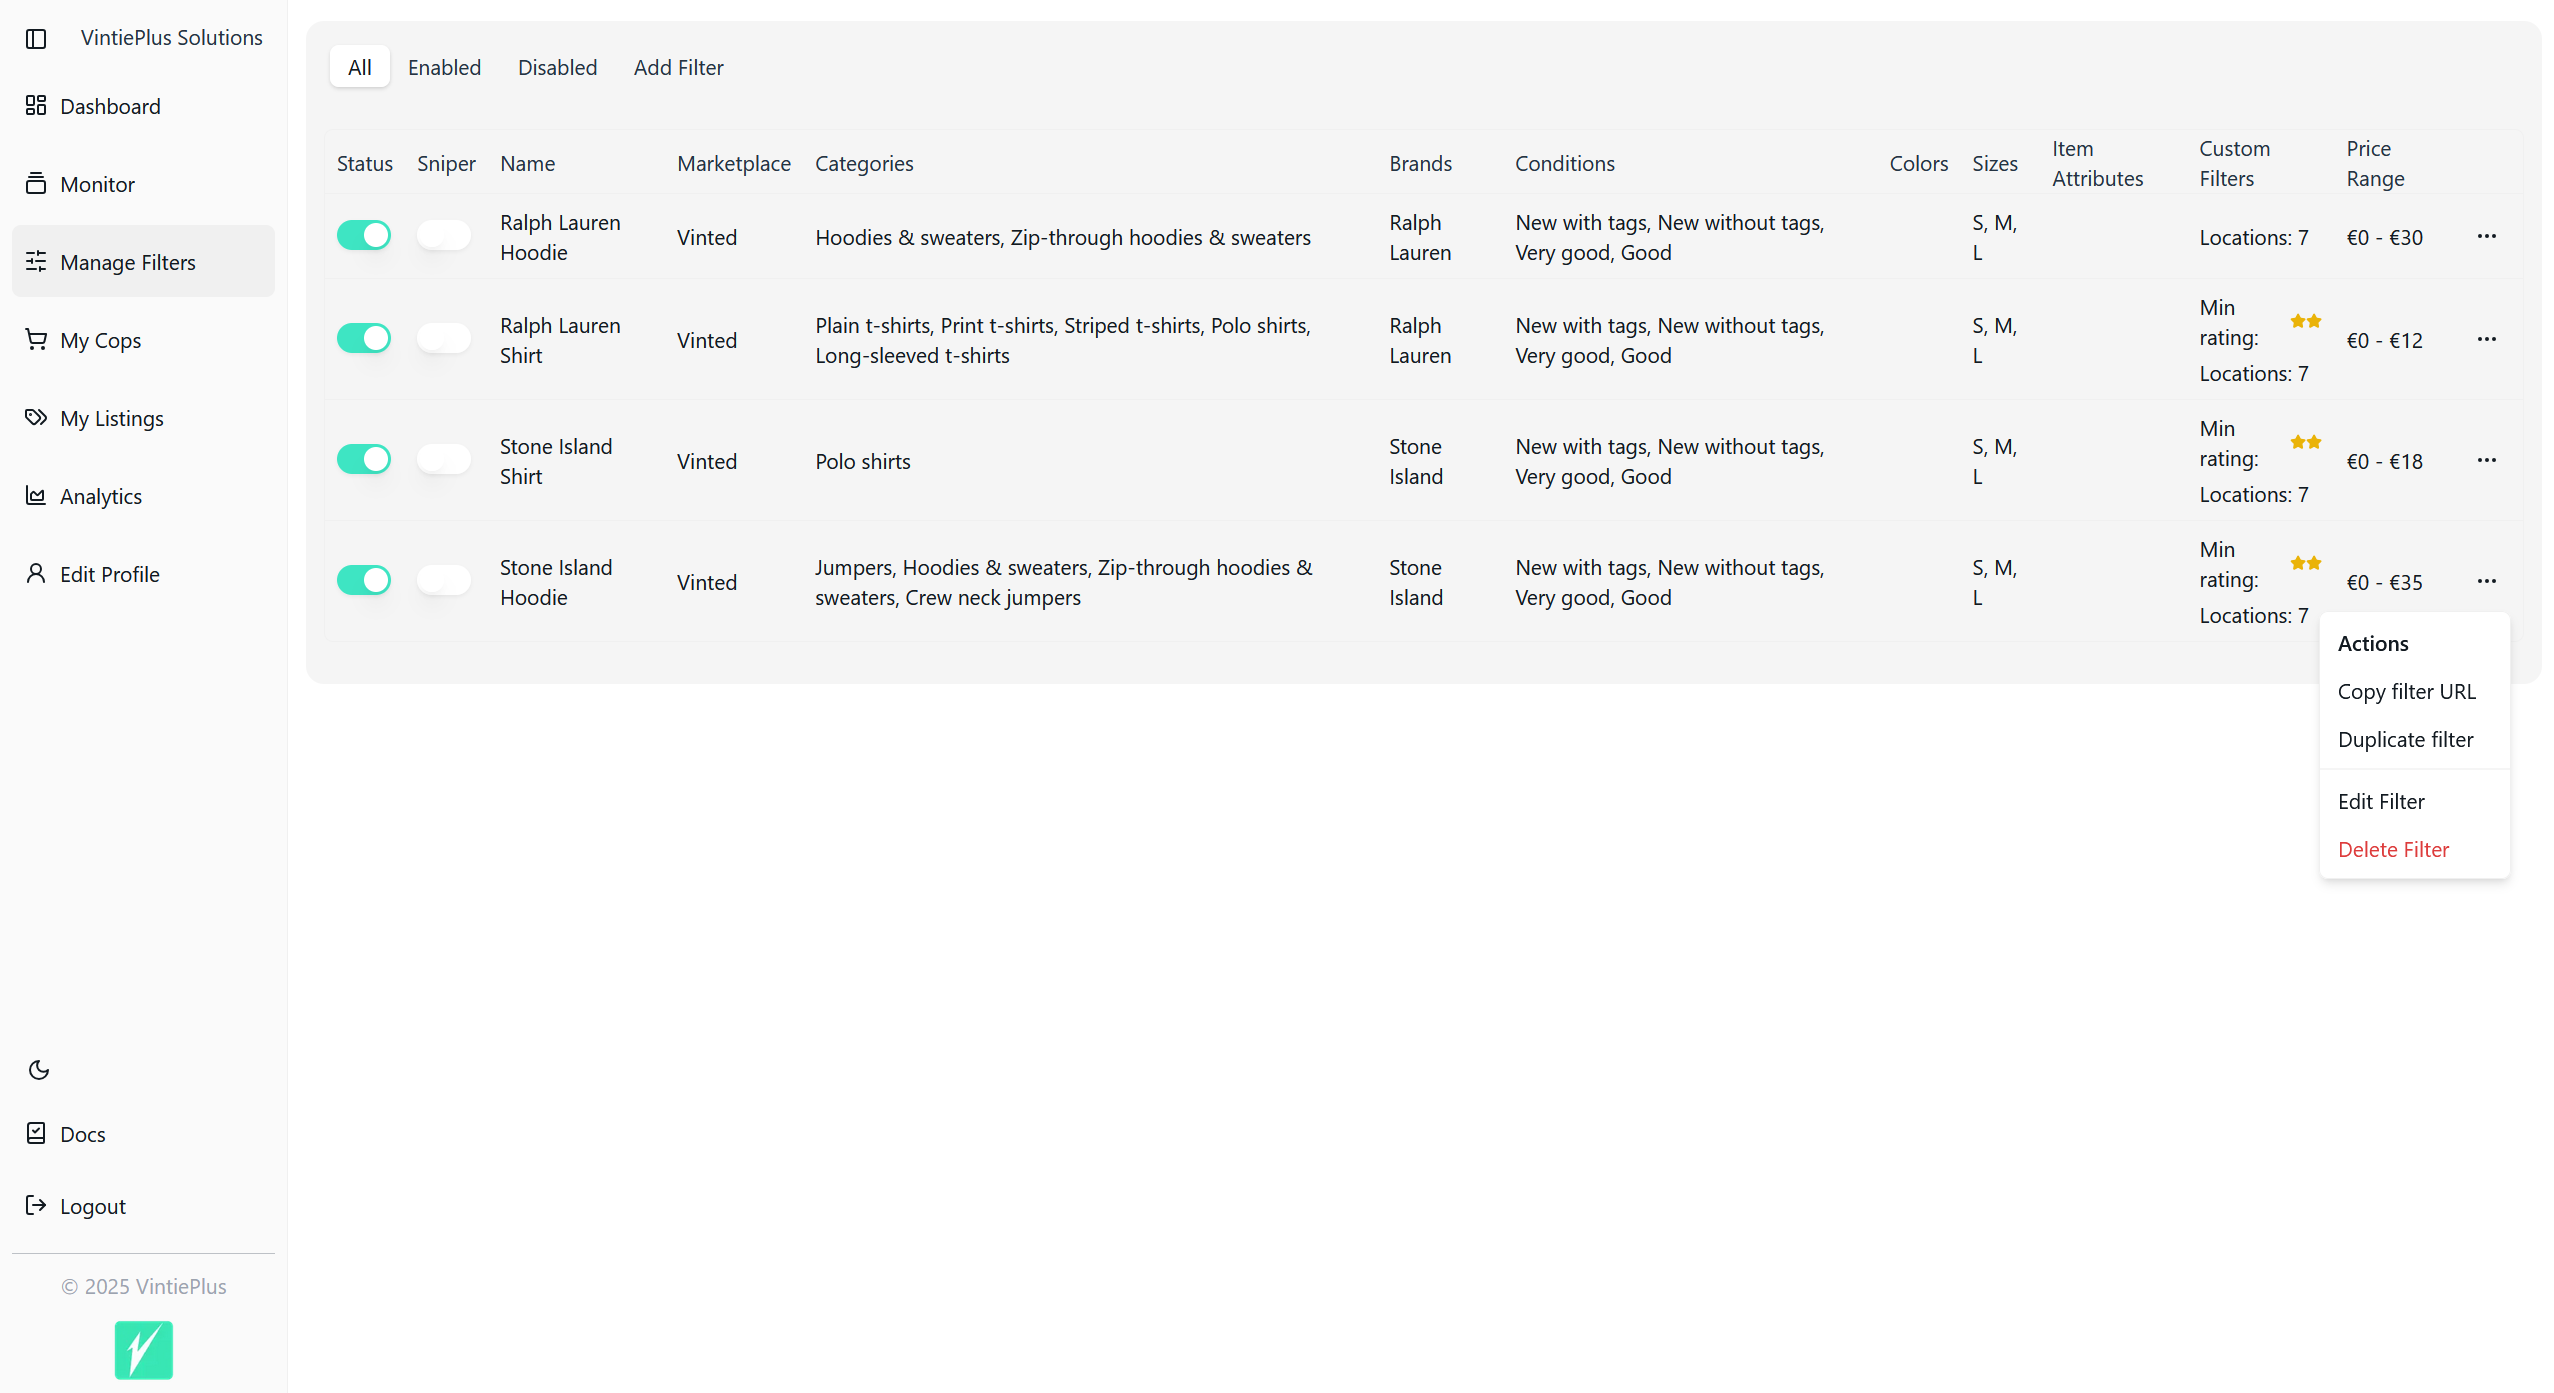
🗂️ Tabs in Manage Filters
The Manage Filters page includes the following tabs for easy navigation:
-
All
- Displays all filters, regardless of their status.
-
Enabled
- Shows only filters that are currently active.
-
Disabled
- Displays filters that are currently inactive.
-
Add Filter
- Allows you to create a new filter. Follow the step-by-step process to set it up.
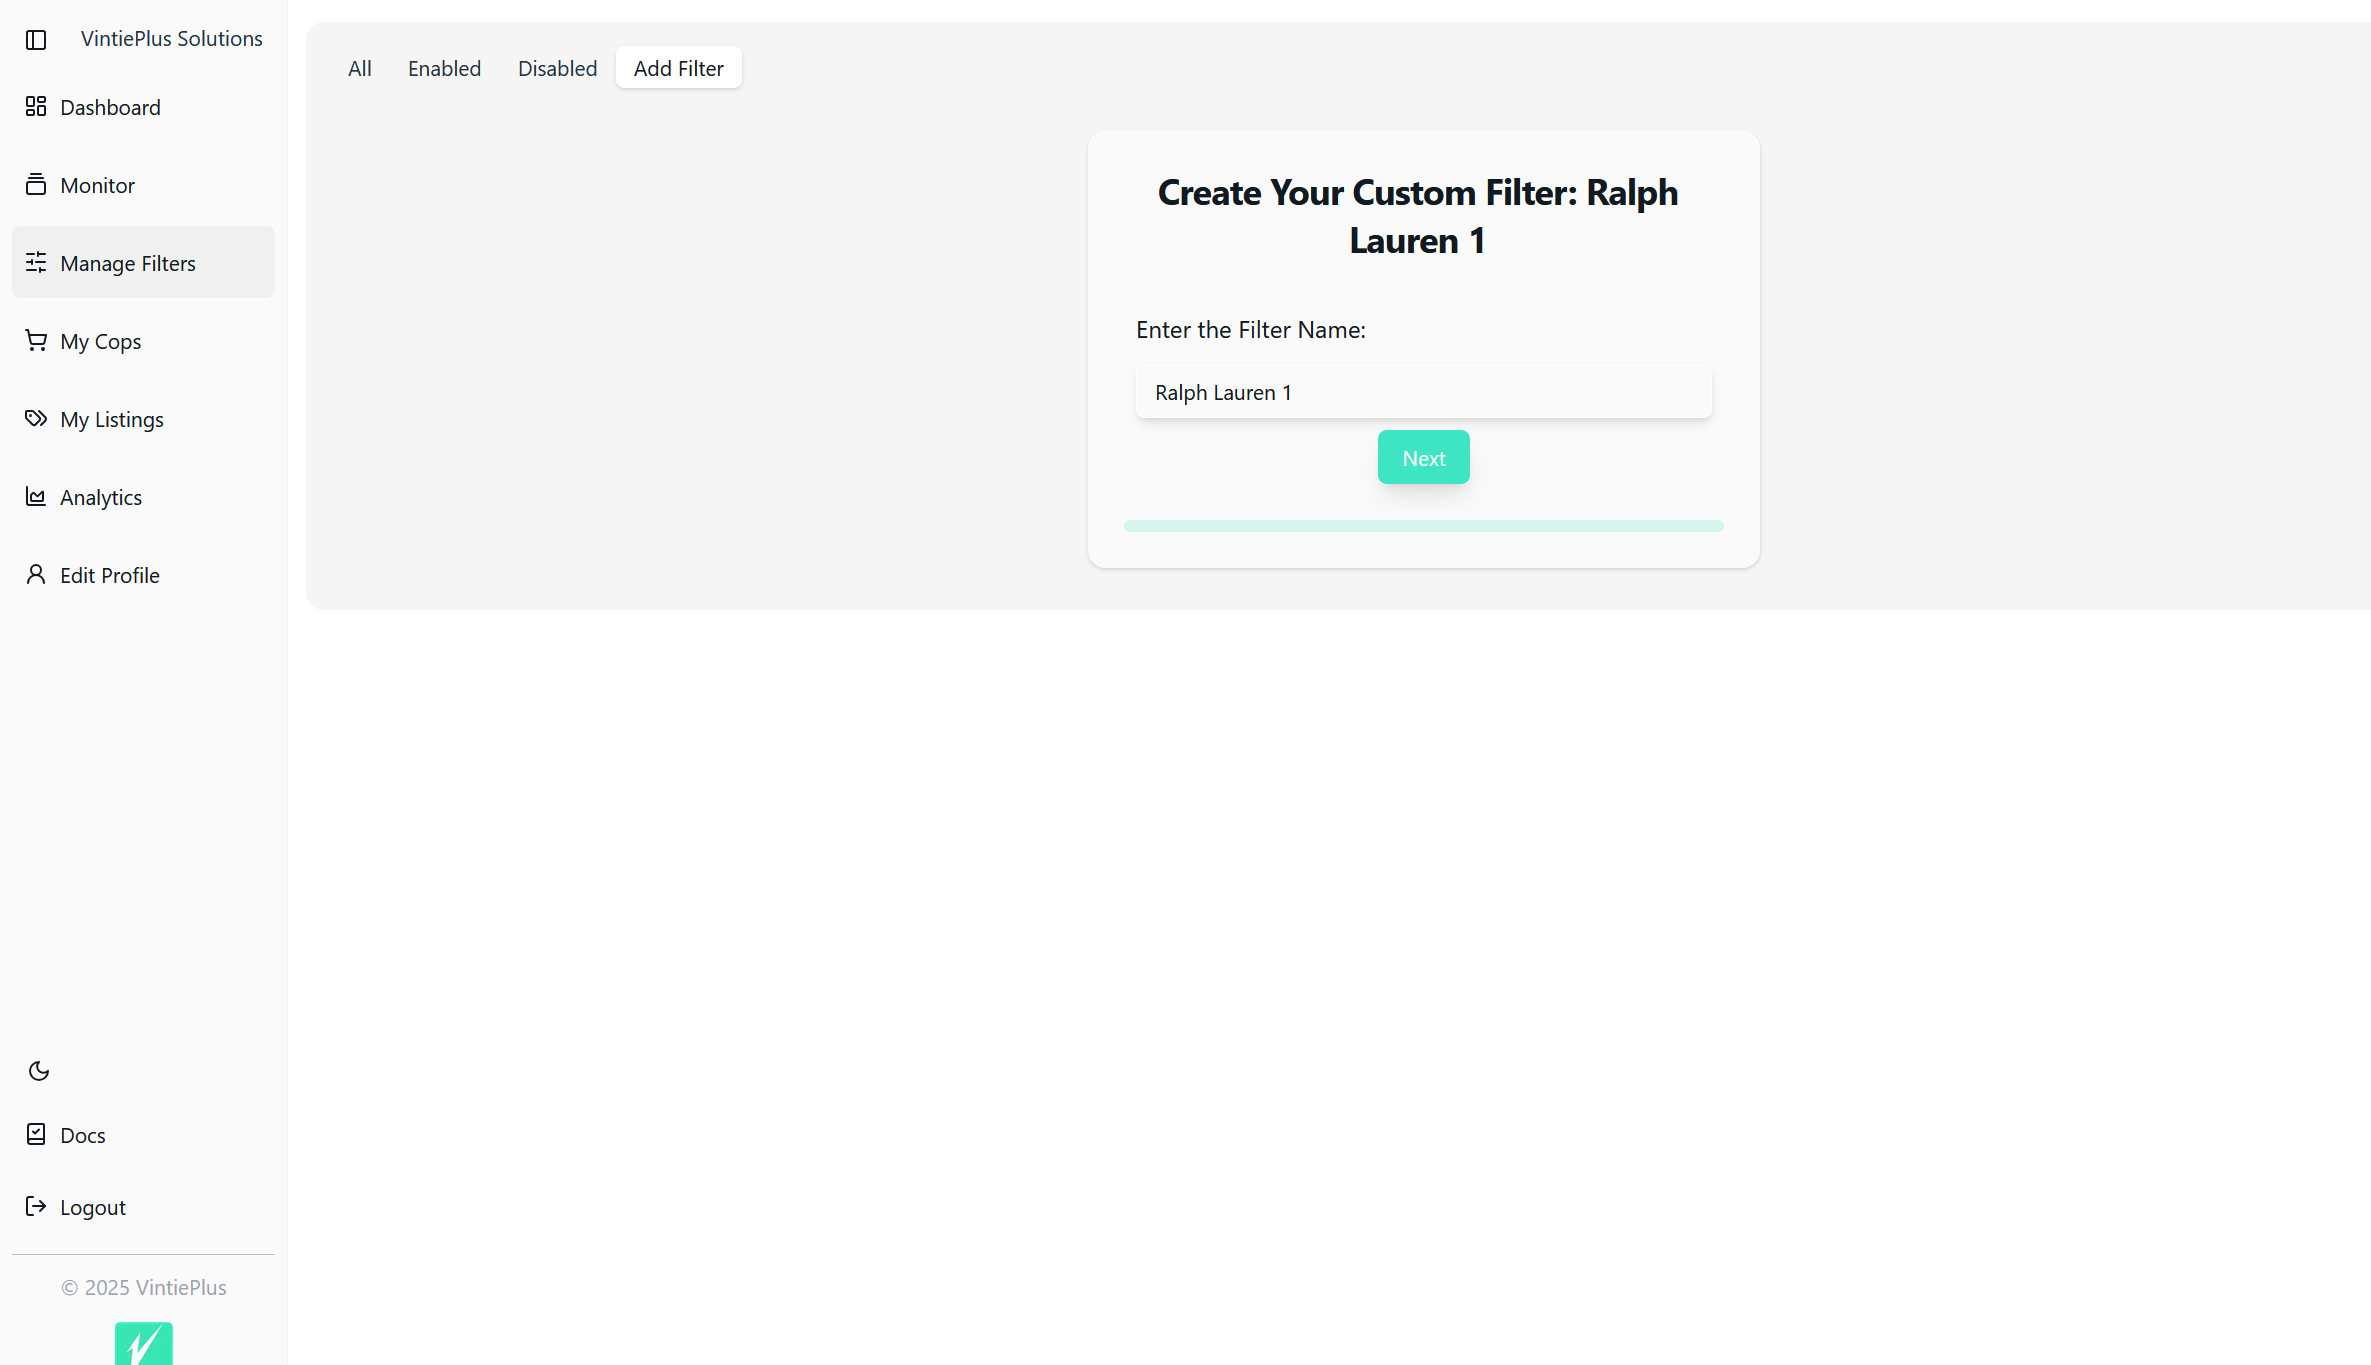
➕ Adding a New Filter
To add a filter, go to the Add Filter tab and follow these steps:
1. Name Your Filter
Give your filter a clear and descriptive name. For example:
"Ralph Lauren Hoodies 1"
This makes it easy to identify and manage your filters later.
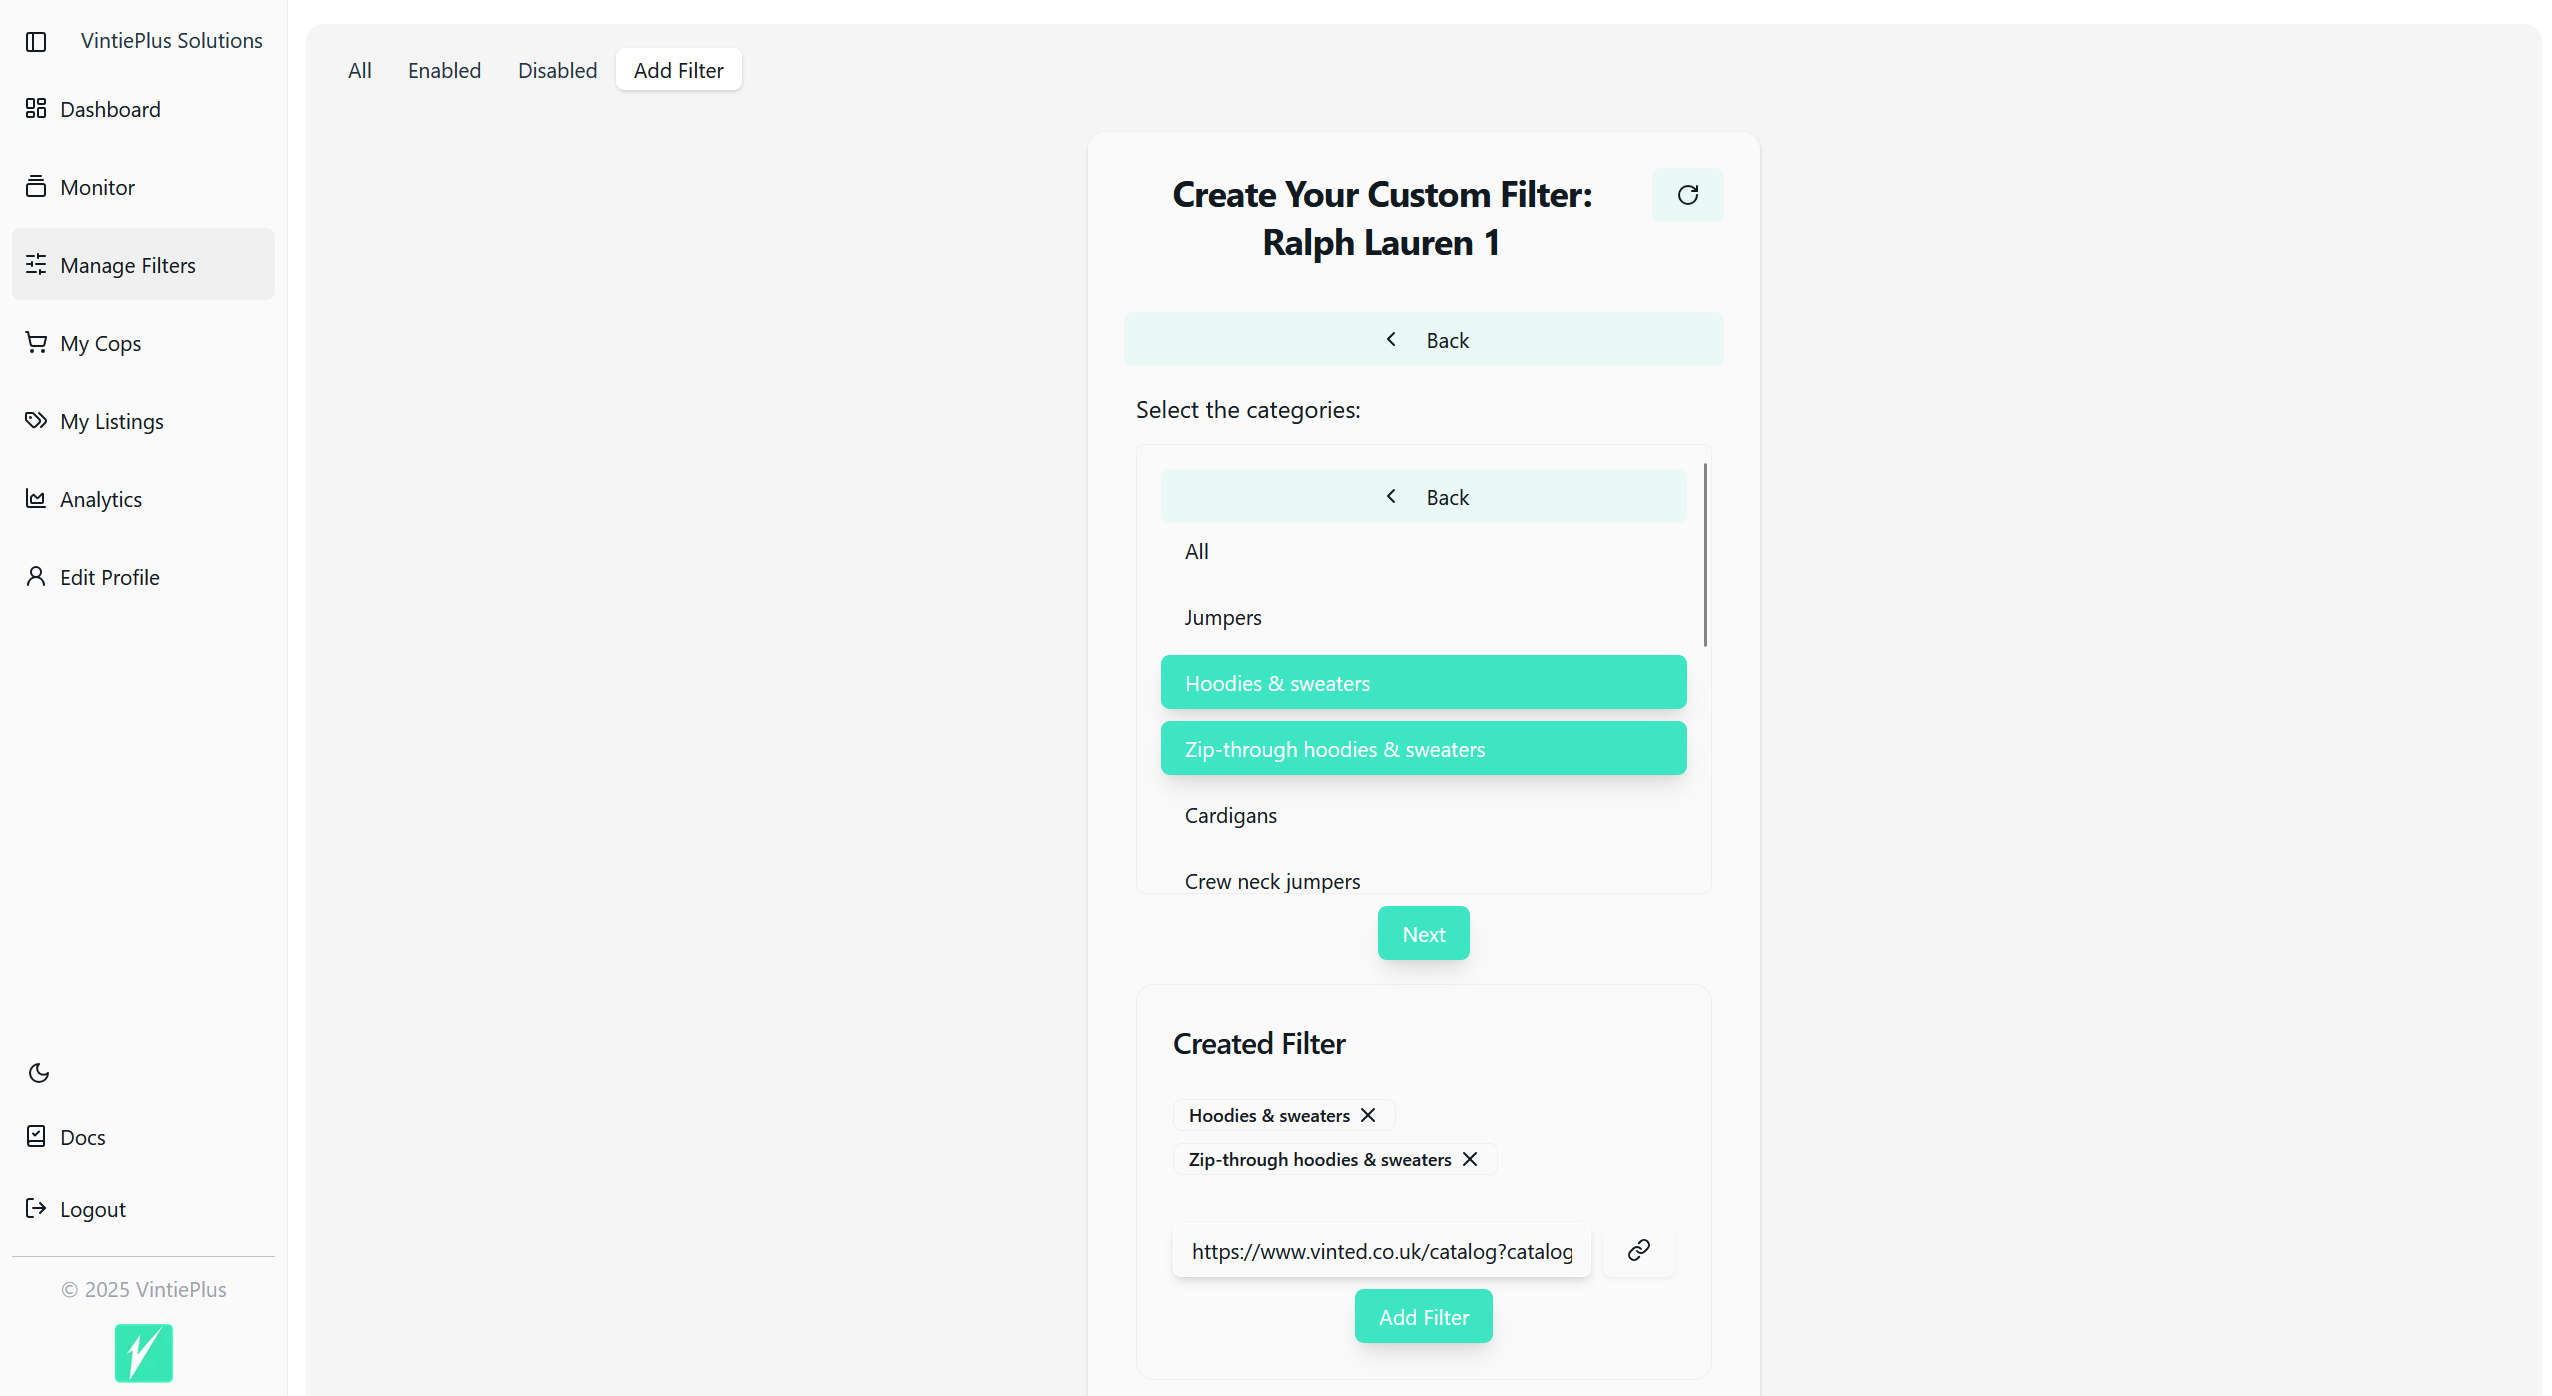
2. Select a Catalog
Choose the category for your filter:
- You can select a main category and then choose specific subcategories.
- If you want to select the entire catalog, you can choose All.

After selecting a main category, you can further refine your filter by selecting specific subcategories:
3. Select Brands
Pick the brands you want to filter for.
Tip: It's best to use one brand per filter. Create a separate filter for each brand so you can easily enable or disable them individually.
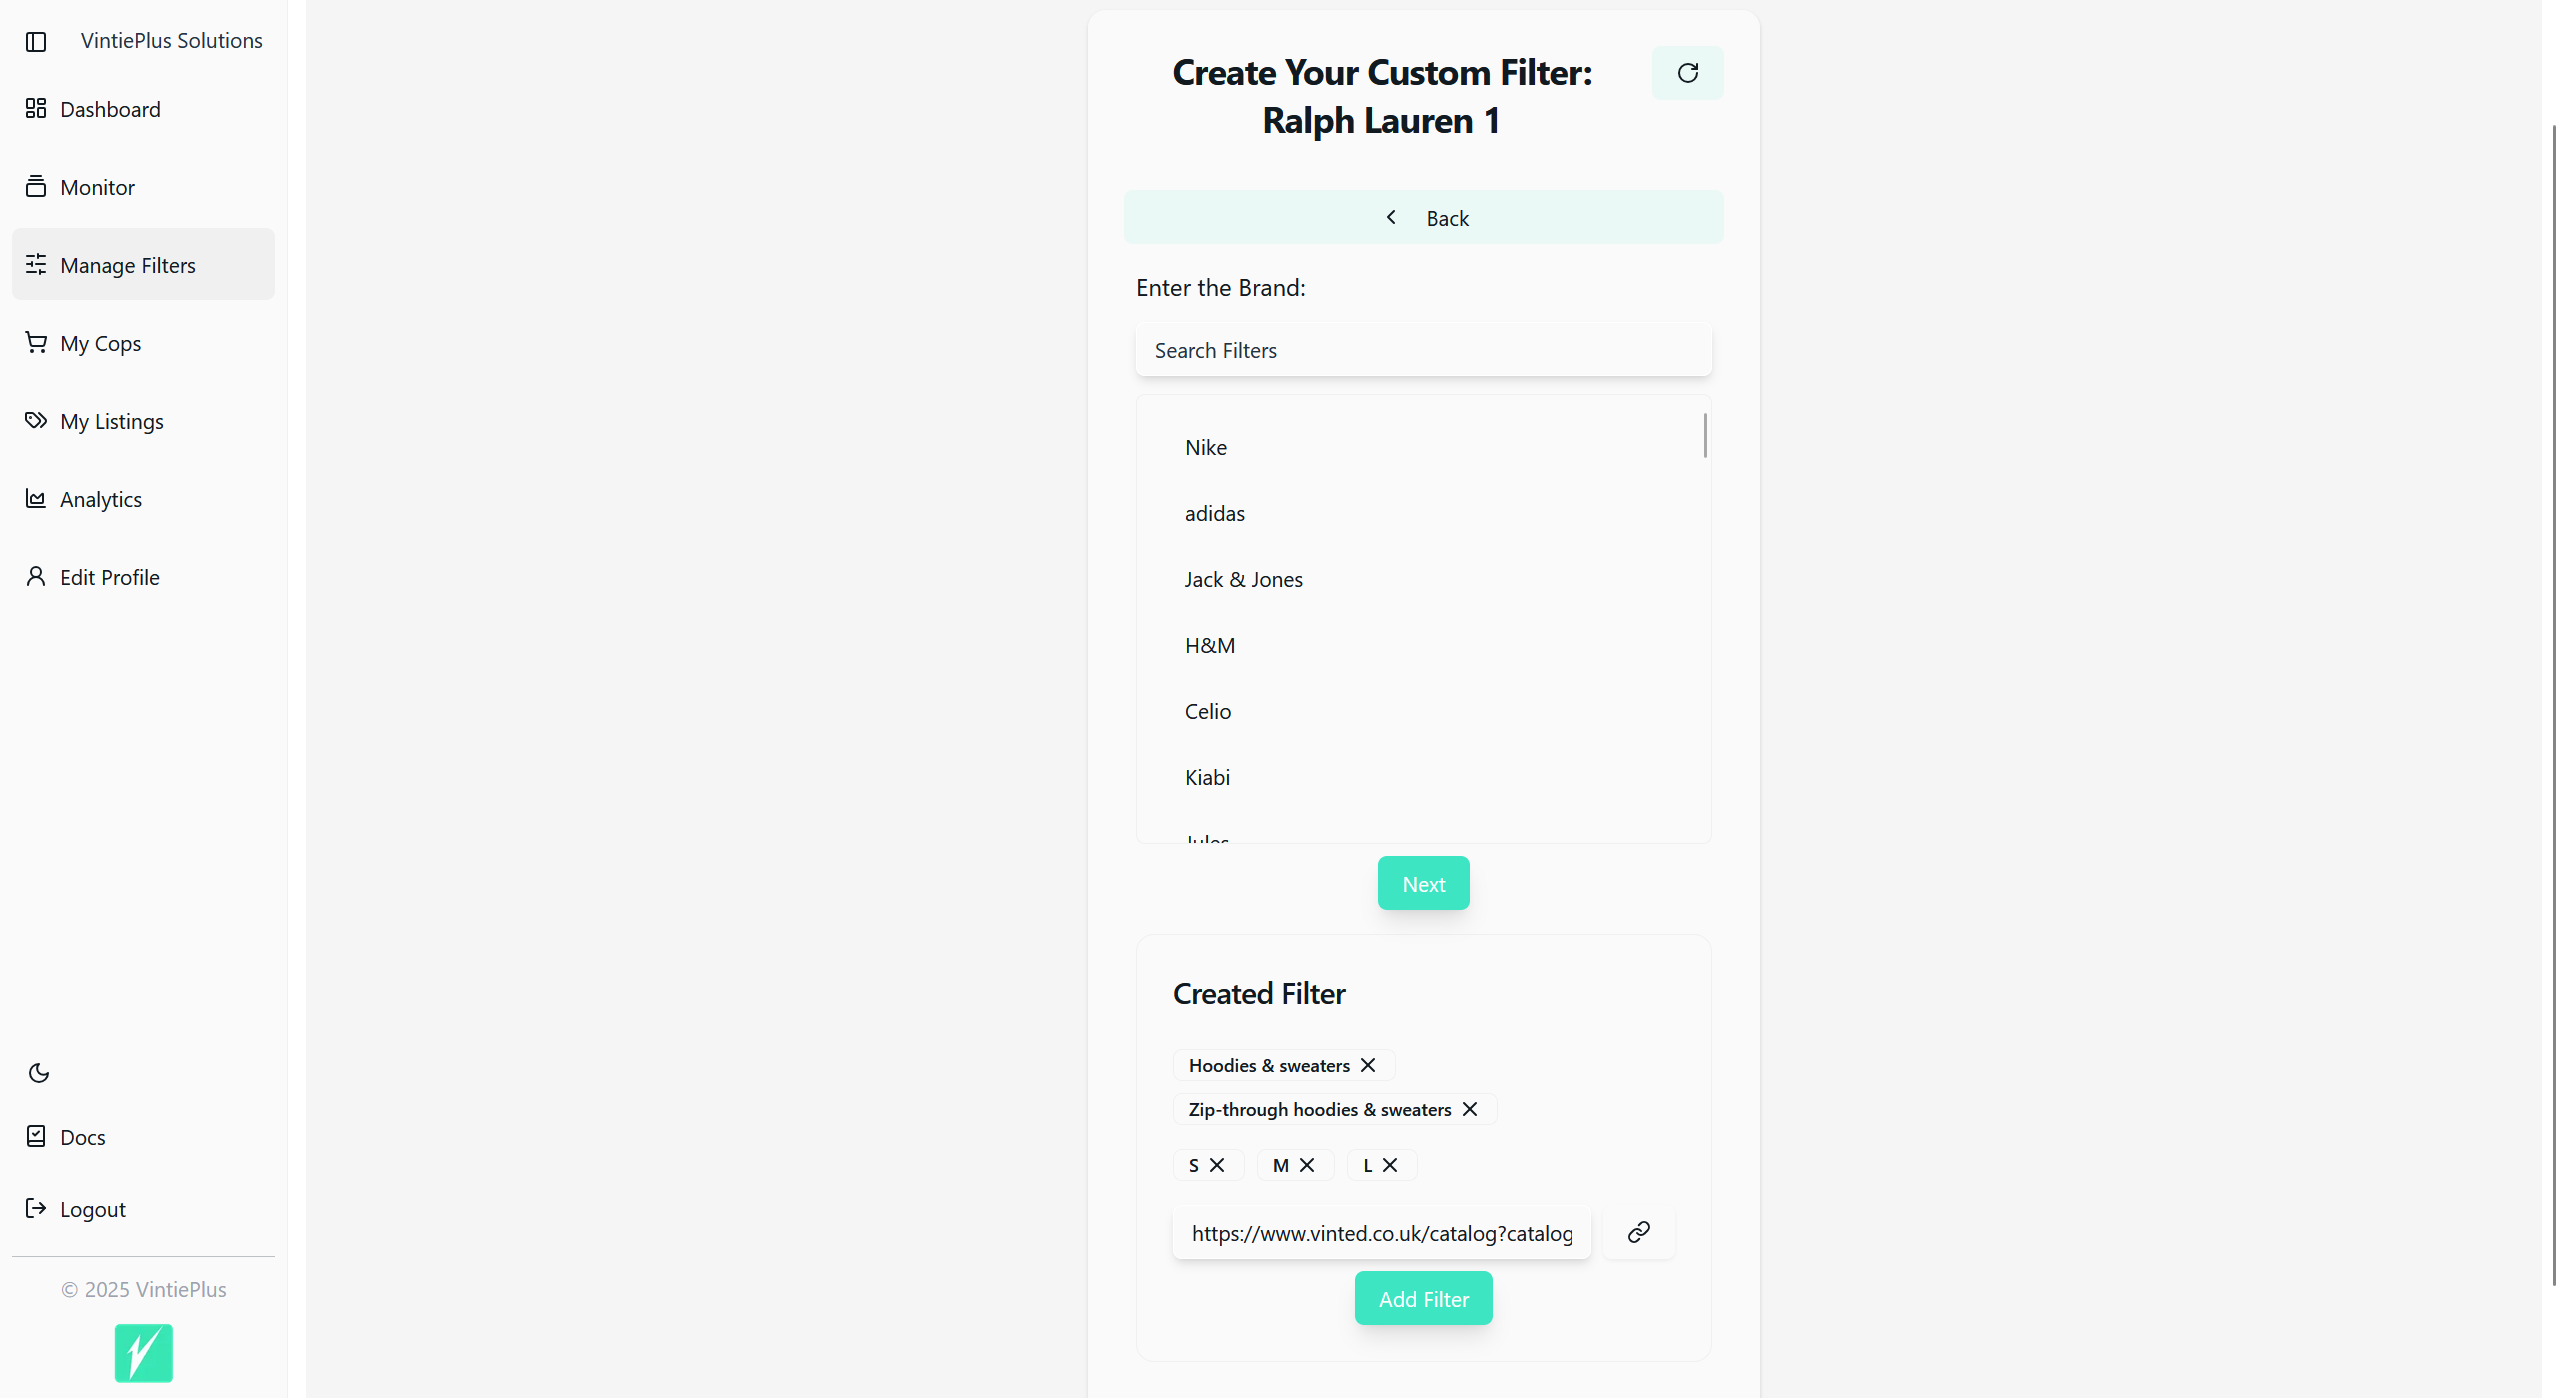
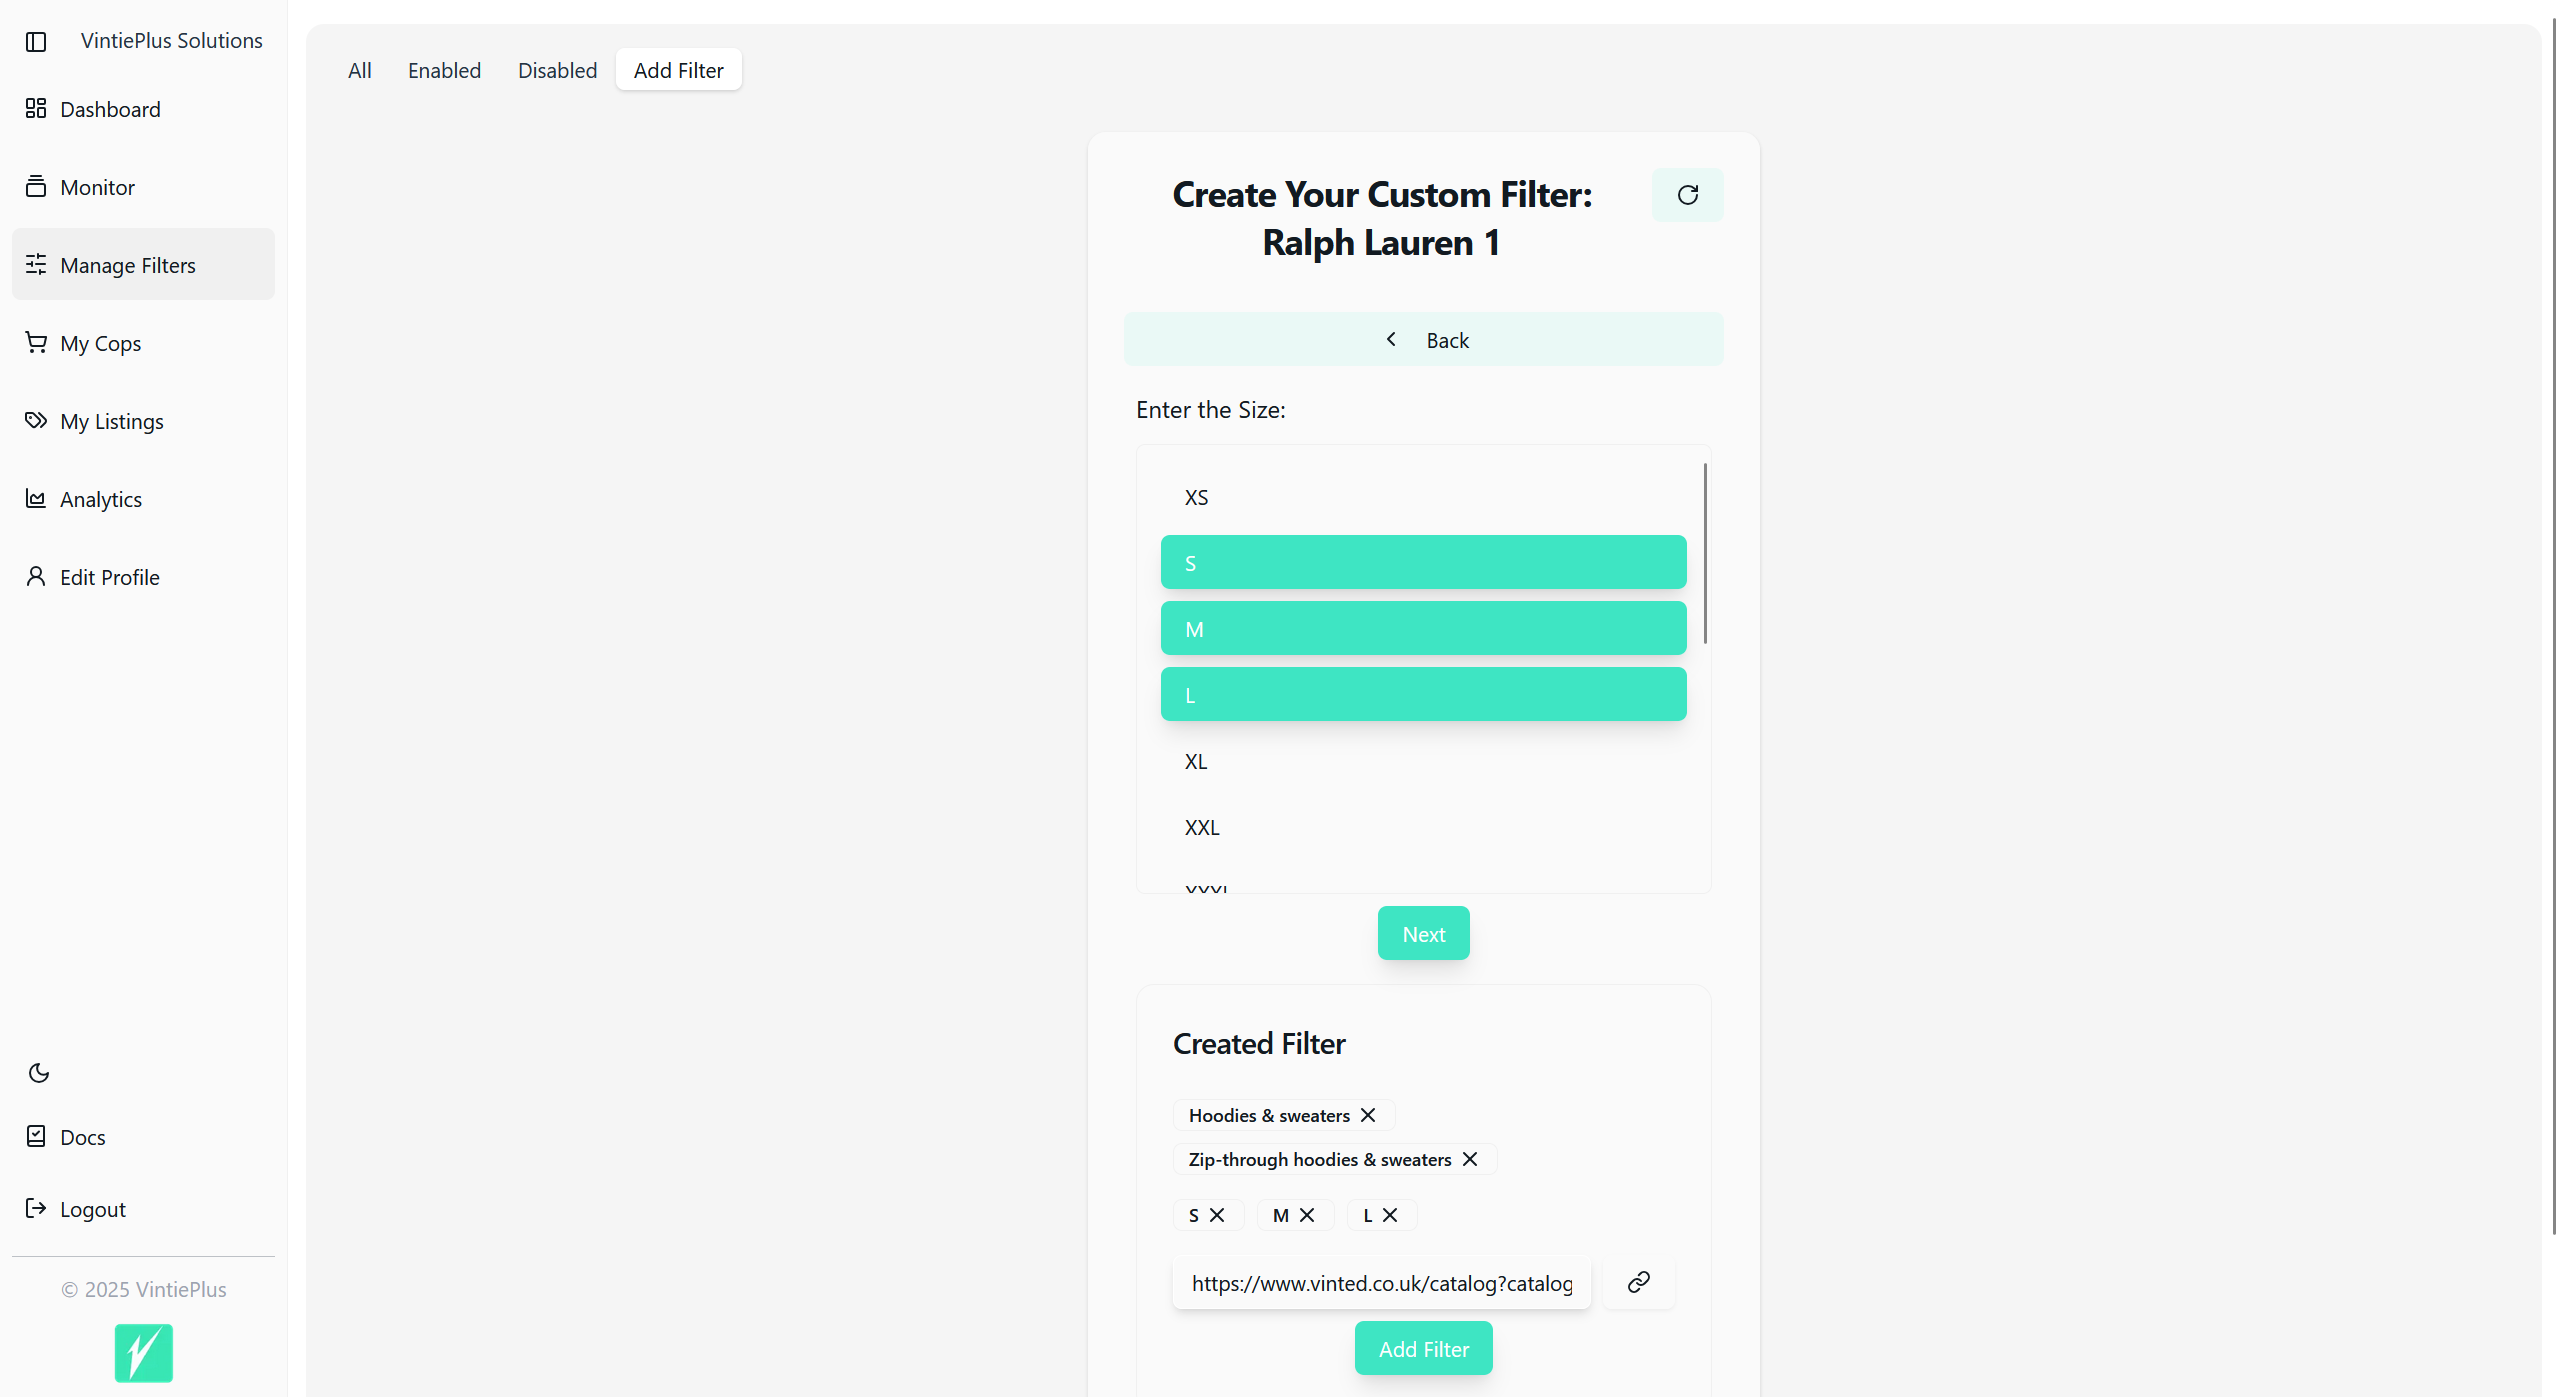
4. Select Sizes
Choose the sizes you want to include in your filter. This helps narrow down items to those that fit you or your target audience.
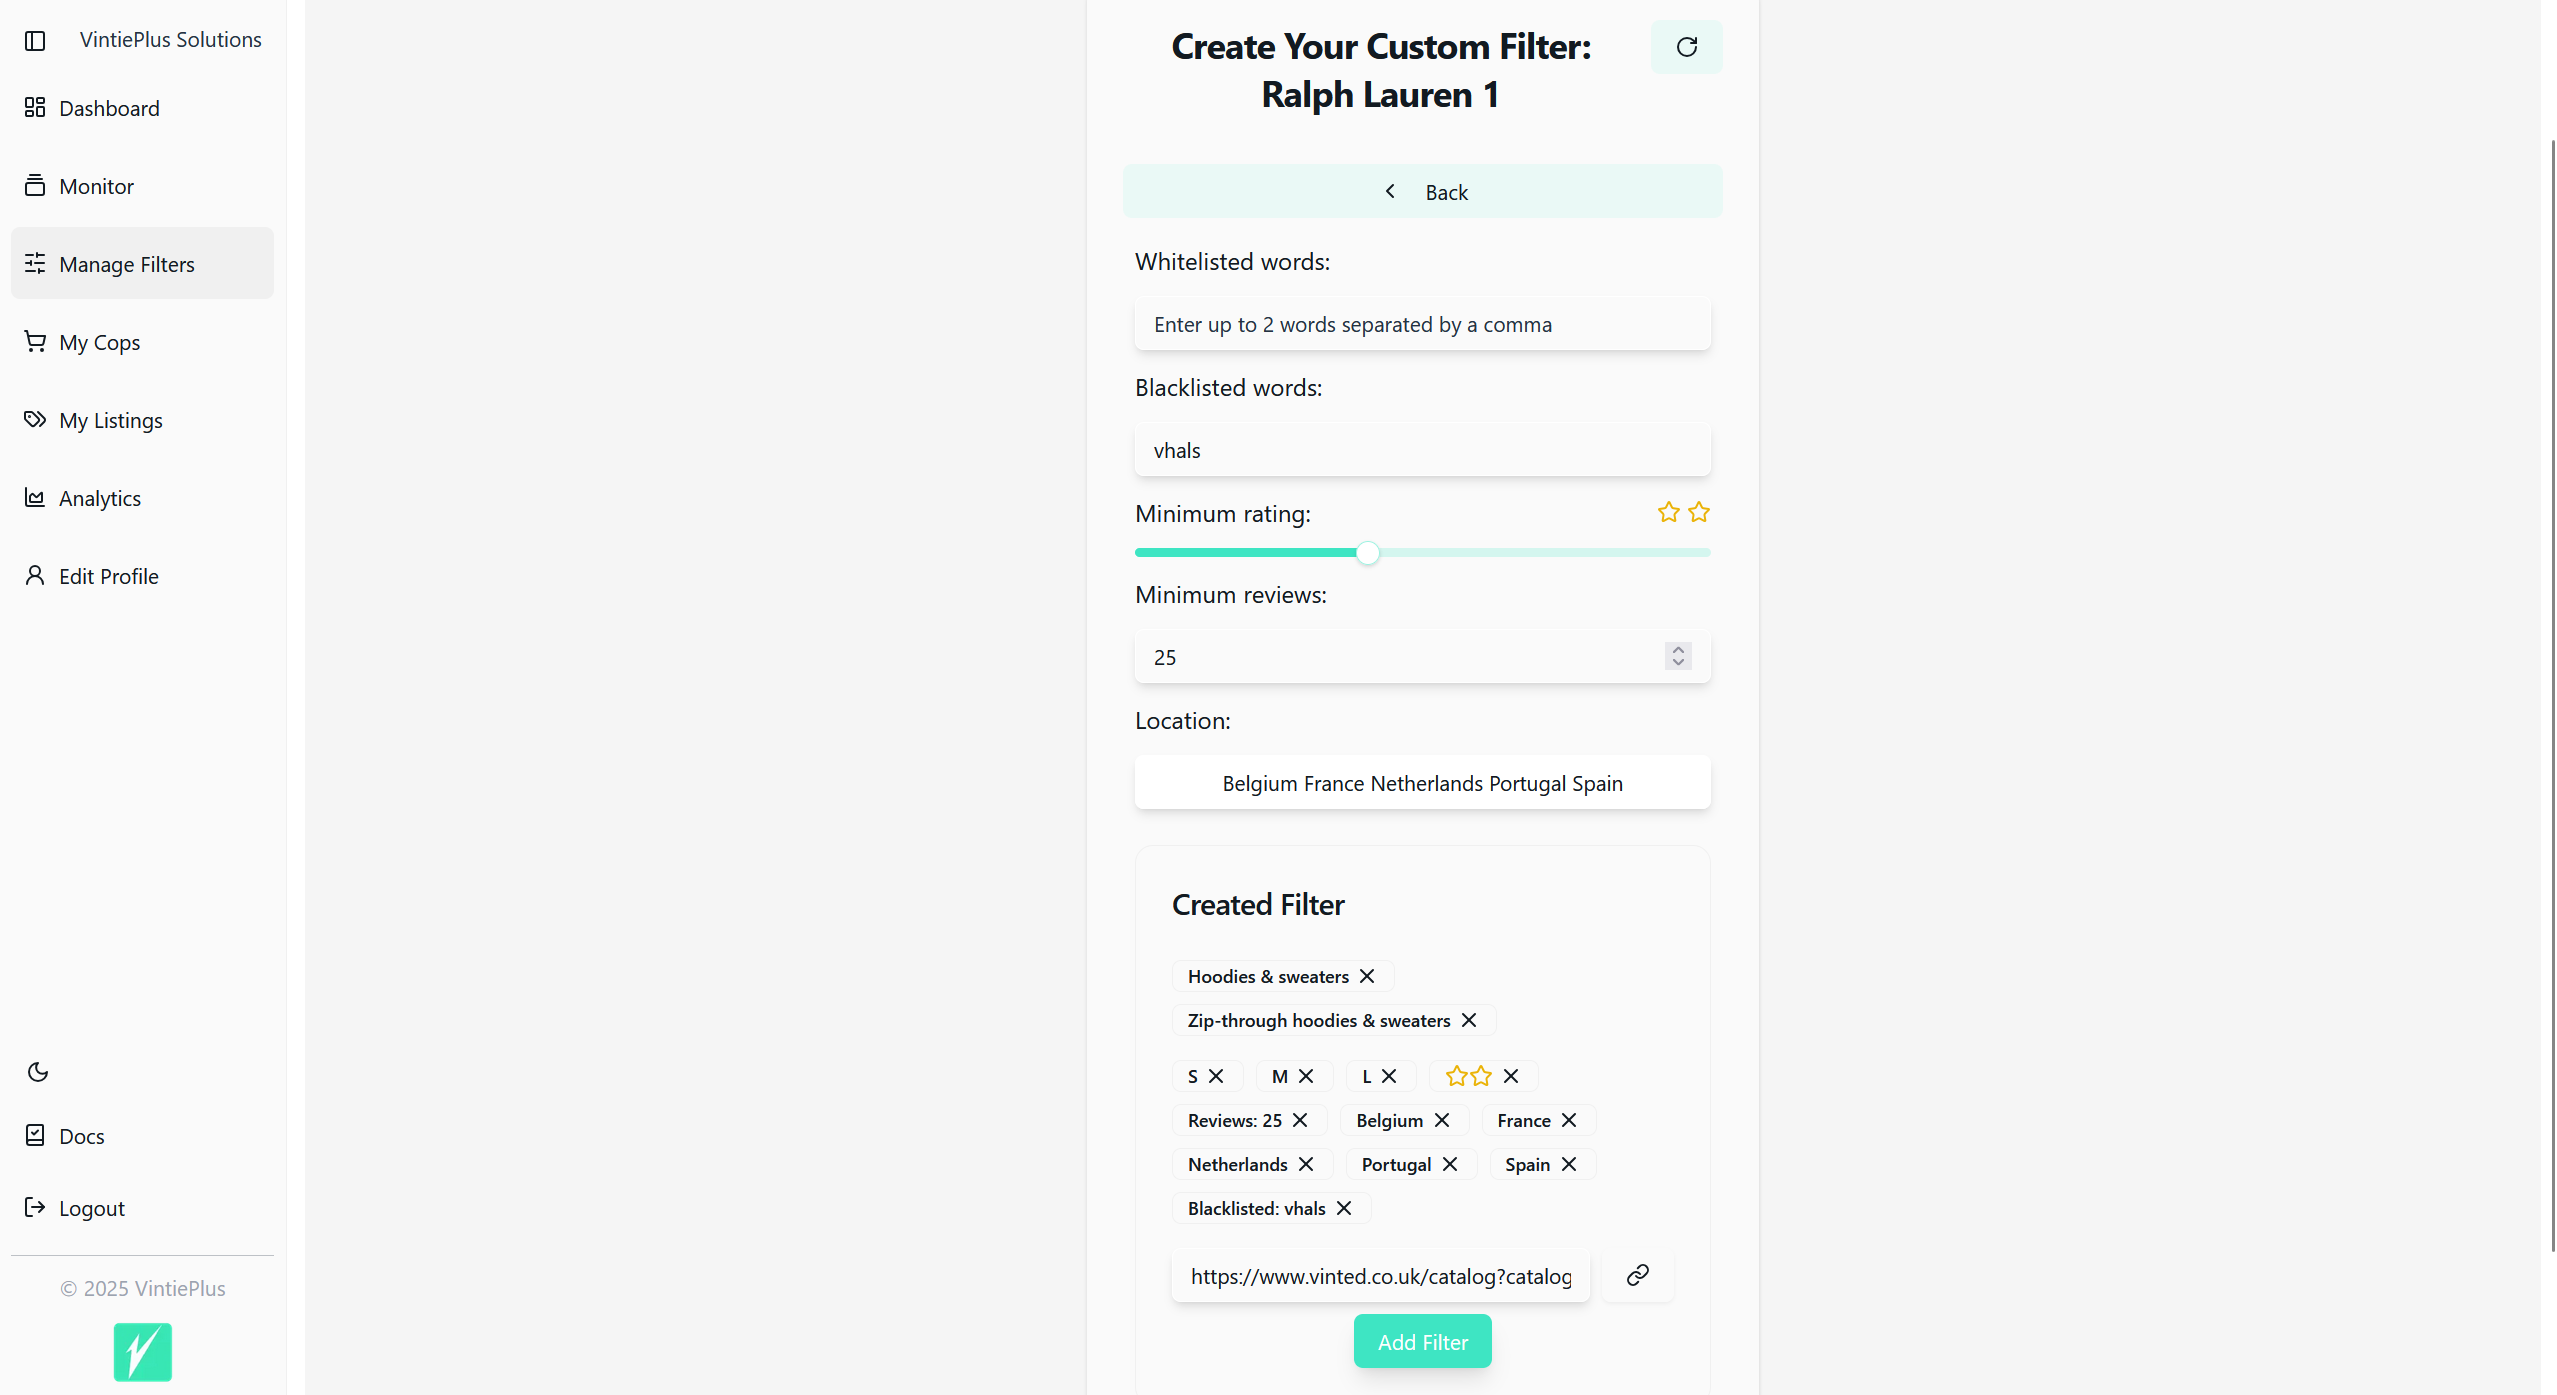
5. Add Custom Keywords
Customize your filter with specific keywords:
- Blacklisted Words: Add words or phrases (separated by commas). Items containing these words will not appear.
- Whitelisted Words: Add words or phrases (separated by commas). Only items containing these words will appear.
- Filter by Seller Rating: Choose to include items from sellers with specific star ratings.
Tip: Use keywords strategically to refine your search without being too restrictive.
6. Choose Regions
Select the countries where you want items to come from:
EU Region
| Country | Code |
|---|---|
| Belgium | 🇧🇪 |
| France | 🇫🇷 |
| Netherlands | 🇳🇱 |
| Portugal | 🇵🇹 |
| Italy | 🇮🇹 |
| Austria | 🇦🇹 |
| Spain | 🇪🇸 |
| Luxembourg | 🇱🇺 |
United Kingdom
| Country | Code |
|---|---|
| United Kingdom | 🇬🇧 |
Germany
| Country | Code |
|---|---|
| Germany | 🇩🇪 |
Scandinavia
| Country | Code |
|---|---|
| Sweden | 🇸🇪 |
| Denmark | 🇩🇰 |
| Finland | 🇫🇮 |
| Norway | 🇳🇴 |
Eastern Europe
| Country | Code |
|---|---|
| Poland | 🇵🇱 |
| Czech Republic | 🇨🇿 |
| Slovakia | 🇸🇰 |
| Hungary | 🇭🇺 |
| Lithuania | 🇱🇹 |
| Romania | 🇷🇴 |
| Bulgaria | 🇧🇬 |
| Greece | 🇬🇷 |
Southern Europe
| Country | Code |
|---|---|
| Italy | 🇮🇹 |
| Spain | 🇪🇸 |
| Portugal | 🇵🇹 |
| Greece | 🇬🇷 |
Other Specific Regions
| Region | Countries |
|---|---|
| Benelux | Belgium (🇧🇪), Netherlands (🇳🇱), Luxembourg (🇱🇺) |
| Ireland & France | Ireland (🇮🇪), France (🇫🇷) |
Tip: Avoid combining multiple regions into one filter. This makes managing your filters easier and more efficient.
7. Removing Selections
If you want to remove a selection, click the "x" on the label of the item to delete it.
🛠️ Adding the Filter
When your filter is ready, click the Add Filter button.
- The filter will be enabled by default and added to both the All and Enabled tabs.
🎉 Congratulations! Your filter is now created and active.
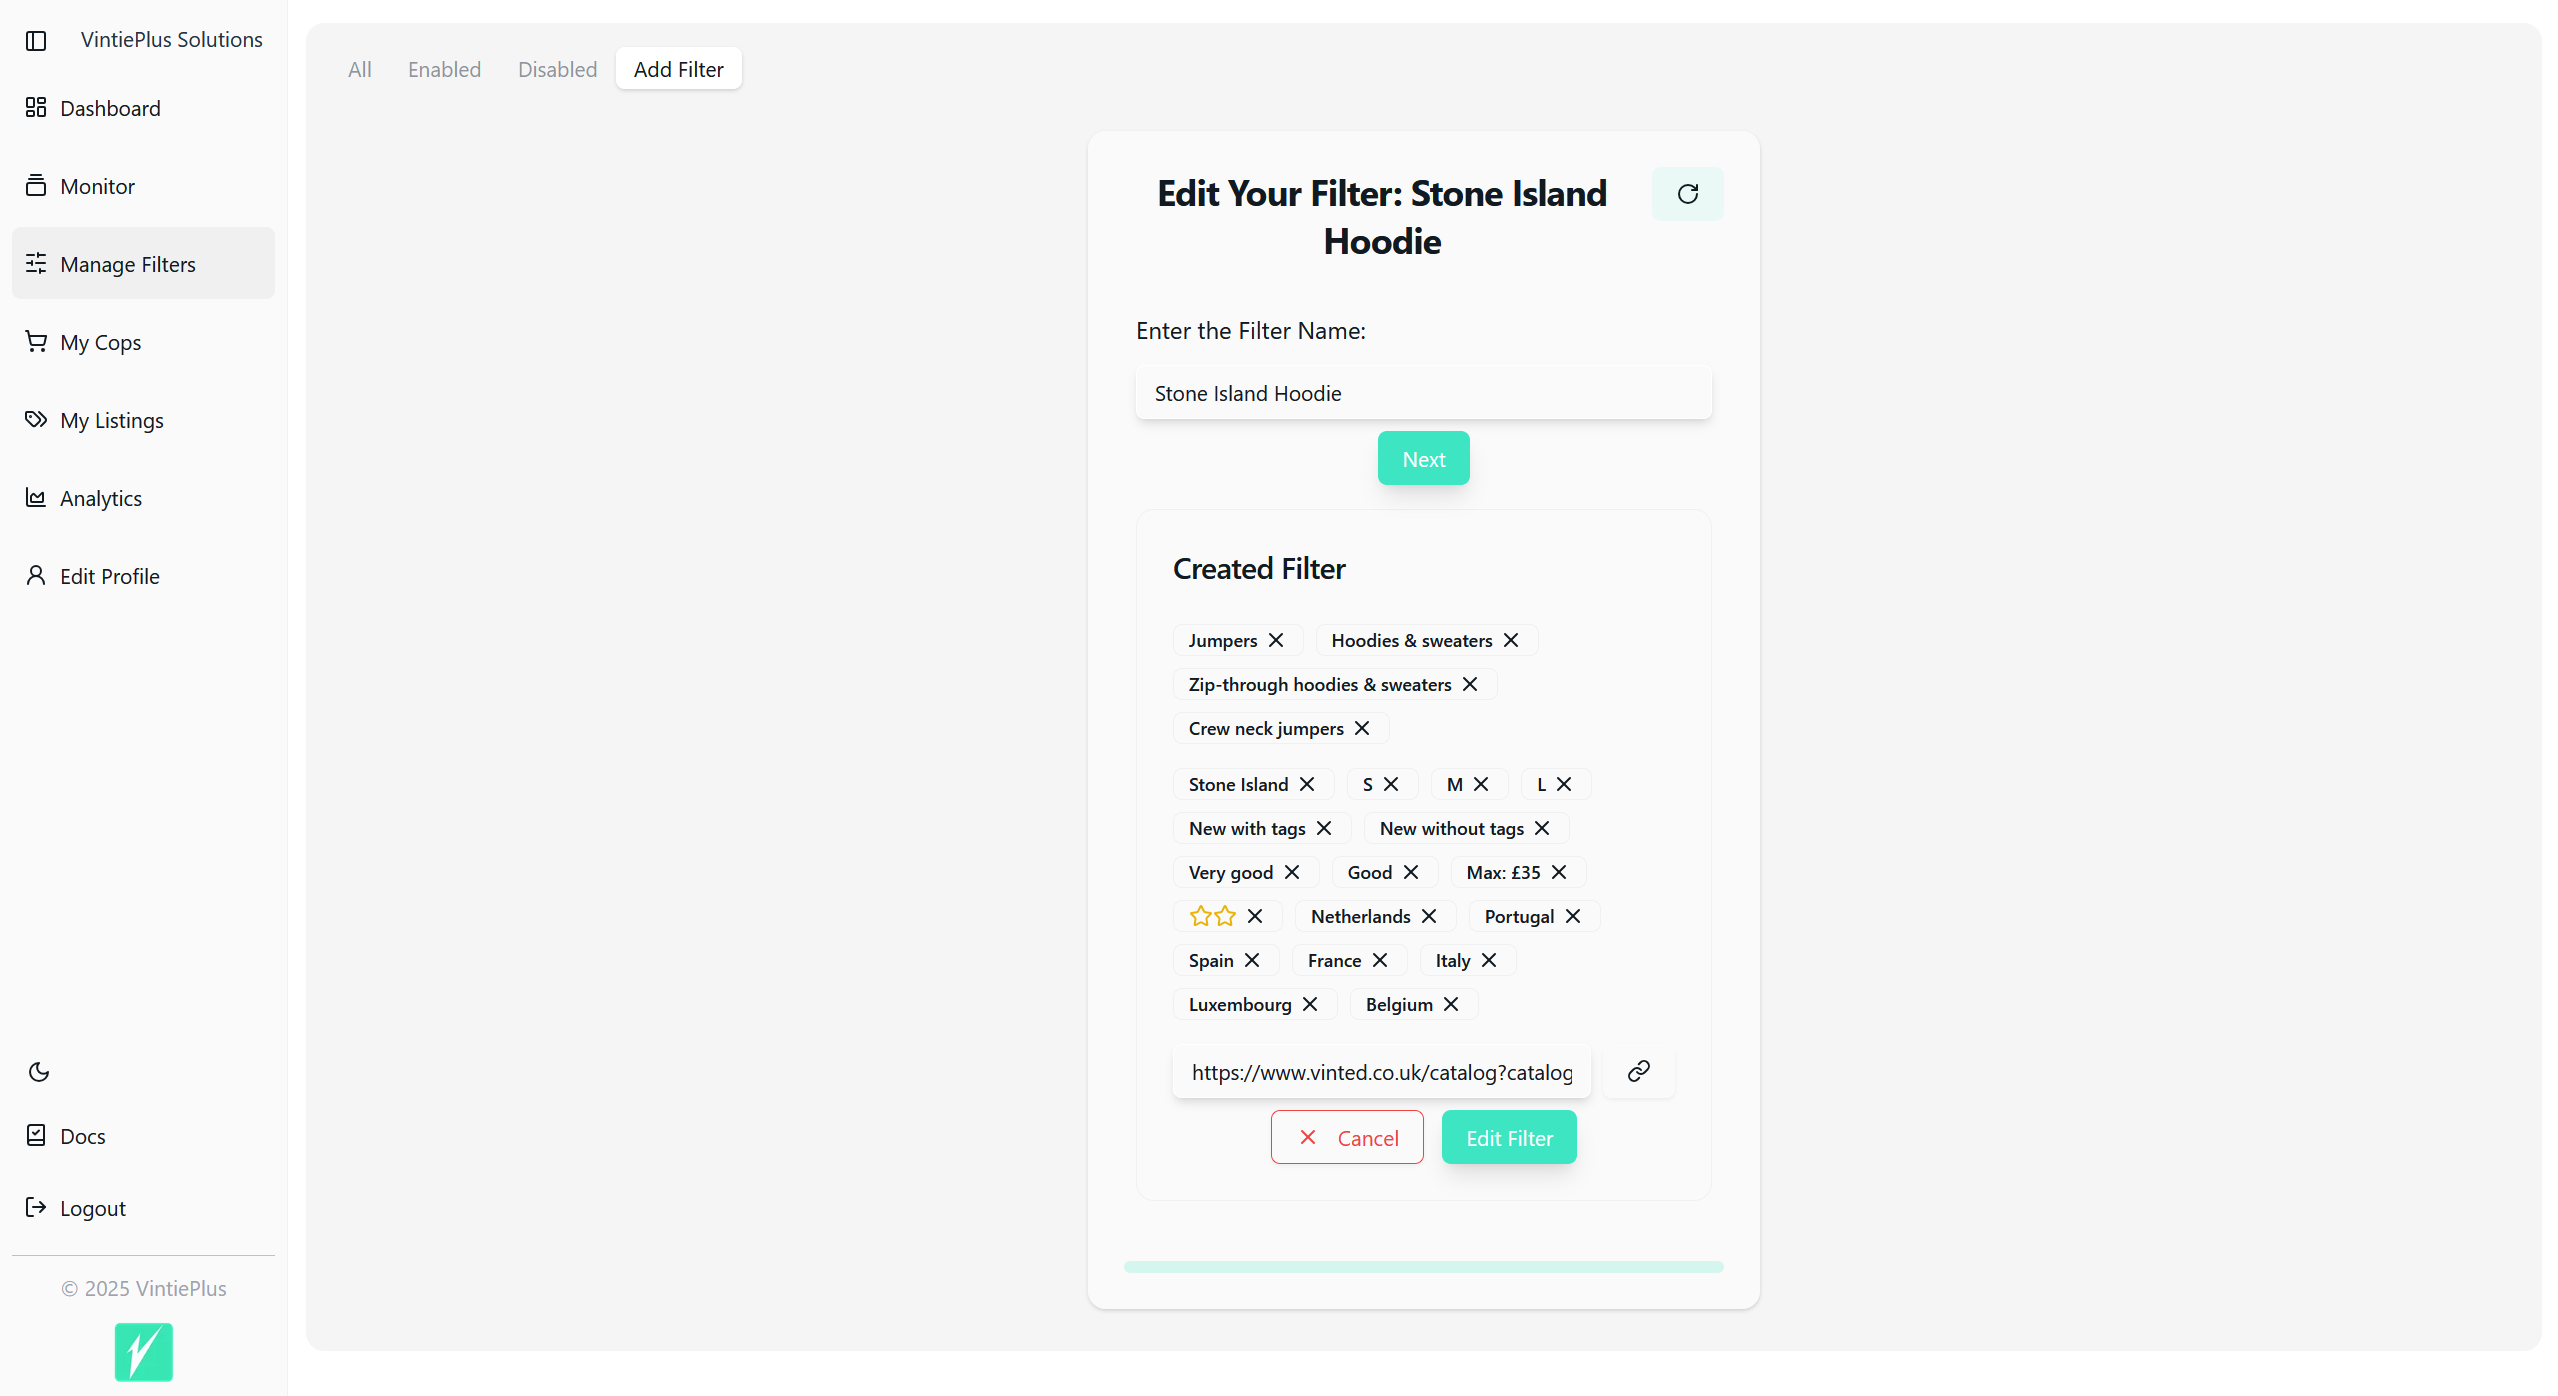
✏️ Editing Existing Filters
To edit an existing filter:
- Find the filter you want to modify in any of the tab views
- Click the edit icon (pencil) to open the edit mode
- Make your desired changes
- Click "Update Filter" to save your changes
💡 Tips for Effective Filters
- Avoid Over-Specific Filters: The more criteria you add, the fewer items you'll see in your Monitor.
- Use Clear Names: Give each filter a descriptive name so you can easily identify it later.
- Separate Brands: Create one filter per brand for better management.
- Check Your Monitor: After creating filters, check your Monitor page to see the items being captured.
Start creating and managing your filters here to optimize your Vinted experience!